


Insulin can only be received via injection and cannot be taken orally.
Diabetes: all you need to know about insulin injections
The insulin preparations currently available in Singapore are mostly from human origin; pork or bovine insulin preparations are hardly used nowadays. Because insulin is digested and destroyed by the stomach, it cannot be taken orally. Currently, the only way to receive insulin is by injection. Insulin should only be used when prescribed by a doctor and dose adjustments should be supervised.
Types of preparations
There are several types of insulin preparations available: They differ mainly in their onset and duration of action. The rapid and short-acting ones are used mainly to control high blood sugar levels after each meal whilst the intermediate and long-acting ones provide the patients with a smoother day long glucose control.
| Types of Insulin Preparations | Onset of Action | Duration of Action |
|---|---|---|
| Rapid-acting | 15 min | 4 hours |
| Short-acting | 1/2 - 1 hour | 6 - 8 hours |
| Intermediate-acting | 2-4 hours | 16 - 18 hours |
| Long-acting | 4 - 8 hours | 24 hours |
| Premixed insulin | 1/2 - 1 hour | 16 - 18 hours |
Insulin should be given as instructed by the nurse or the pharmacist. The insulin preparations are available in vials, cartridges or penfills and disposable pens. The main precaution the patient needs to be aware of is the risk of developing low blood sugar levels. Low blood sugar levels may happen when the patient is not eating well, taking alcohol on an empty stomach or due to some drug interactions.
How to draw insulin
How to draw a single type of insulin

1. Wash and dry your hands.
2. Clean the rubber stopper on the insulin vial with an alcohol swab.
3. Roll the insulin vial gently between the palms your hand. This provides the dual benefit of mixing the insulin and warming it to body temperature to reduce pain when injecting.

4. Take the syringe from the packet and remove the cap.
5. Draw in air equal to the dose of insulin by pulling the plunger down.
6. With the vial standing upright, insert the needle into the rubber stopper on the vial and push the plunger down. This pushes air into the vial, which makes it easier when withdrawing the insulin out of the vial.

7. Turn the vial and syringe upside down. Slowly pull the plunger down about 5 units past the required dose. If there are no bubbles, push the top of the plunger tip up to the line, which marks the exact dose. If air bubbles are in the syringe, remove them by flicking or tapping the syringe at the bubble with your finger. When the air bubbles rise to the top of the syringe, push the plunger tip up to the exact dose. It is important to get the air bubbles out of the syringe so that you have an accurate dose of insulin.
8. Remove the syringe from the vial.You are now ready to give the injection.
How to draw two types of insulin

1. Wash and dry your hands.
2. Clean the rubber stopper on the insulin vial with an alcohol swab.
3. Roll the insulin vial gently between the palms of your hand. This provides the dual benefit of mixing the insulin and warming it to body temperature to reduce pain when injecting.

4. Remove the coloured cap of a new vial.Take the syringe from the packet and remove the cap.
5. Draw in air equal to the dose of the cloudy insulin by pulling the plunger down.
6. Insert the needle in the cloudy insulin and inject air into the vial. Do not draw out the cloudy insulin yet. Take the empty syringe out of the cloudy insulin vial.

7. Draw in air equal to the dose of clear insulin.
8. Insert needle into the clear insulin and inject air.
9. Turn the vial of clear insulin and syringe upside down and draw out exact dose.

10. Insert the needle into the vial of cloudy insulin. (Do not push in plunger as this would inject clear insulin into cloudy insulin vial.) To avoid air bubbles, slowly pull back plunger to the exact unit marker for the total dose of clear and cloudy insulin units prescribed.
11. Remove the syringe from the vial. You are now ready to give the injection.
How to select an injection site and inject
How to select a site for injection
- Insulin is injected into the subcutaneous tissue (between the skin and the muscle layer).
- The site for injection is important as insulin absorption rate varies from site to site. Eg. Abdomen - the fastest, Arm - intermediate, Thigh and buttock - the slowest
- Rotate the injection site within one area to avoid development of "fatty lumps" or "hollow"
- Avoid injections into areas that will be exercised, e.g. arm or thigh when playing tennis.
- Clean the injection site with soap and water. It is not necessary to swab the skin area with methylated spirit 70% at home, as this can lead to thickening of the skin.
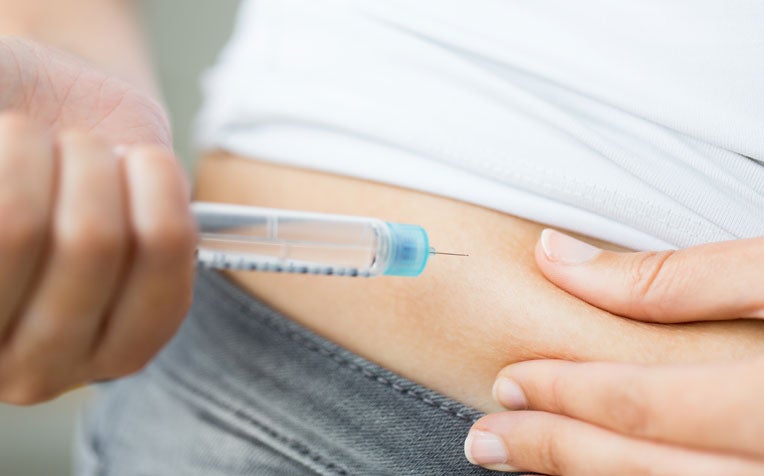
How to give an injection with a syringe

- Select a clean injection site. Insulin is absorbed most evenly from the abdomen. Pick a spot at least 1 inch from the place you gave your last shot.
- Firmly pinch up a large area of skin in the abdomen with thumb and forefinger. Hold the syringe with the other hand. Push the needle at an angle of 90 degrees to the skin, all the way in.
- Inject insulin by pushing the plunger all the way down with index finger and release the pinched skin. Place the swab over the injection site and press down on it lightly as the needle is removed. If slight bleeding occurs, gently press over the injection site for a few seconds. Do not rub the injection areas as this may cause insulin to be absorbed too quickly.
- Dispose of syringe safely.
How to store insulin vials
- Unopened insulin vials should be stored in the lower compartment of the refrigerator away from the freezer. Frozen insulin should never be used.
- The current vial in use can be kept at room temperature or the coolest possible place for up to 4 weeks.
- Do not keep insulin in a hot place (e.g. in a hot, closed vehicle, on top of a television set) or expose it to heat or sunlight. Long exposure to direct sunlight will gradually degrade insulin and give it a yellowbrown colour. Do not use the insulin if this happens.
Ref: S13
Contributed by


Stay Healthy the Easy Way
Get trusted health advice, offers and more.

Get the Health Buddy App


Follow HealthXchange

